Download PDF
Download page Instrument Android Applications.
Instrument Android Applications
To instrument Android Applications, you need to first build the application for the platform you are using and then add the instrumentation code.
To get started, follow the instructions below:
Build the Android Application
To build your application, follow the instructions for your platform:
If you are fetching the AppDynamics Android SDK from the AppDynamics Download page, see Download Manually.
Gradle/Android Studio
Complete the following steps to configure the build for your Android application:
- Confirm the compatibility of your Gradle, Android Tools with the AppDynamics plugin versions.
- Install the Android Agent.
- Activate the plugin.
Install the Android Agent
Use the native package system to install the Android Agent. In the app module build.gradle, add the class path of the AppDynamics Gradle Plugin to the build path dependencies clause. For classpath 'com.appdynamics:appdynamics-gradle-plugin:' use the latest Android Agent version from the AppDynamics Downloads Portal. However, you can use an older version of the AppDynamics plugin for compatibility between your Gradle and Android Tools or for other reasons.
If you are unable to use the Android Gradle plugin 3.4.1 or higher, you will have to use the Android Agent 20.4.0 or an earlier version.
buildscript {
    repositories {
        jcenter()
    }
    dependencies {
        classpath 'com.android.tools.build:gradle:1.1.0'
        classpath 'com.android.tools.build:gradle:3.4.1' // 3.4.1 or higher
        classpath 'com.appdynamics:appdynamics-gradle-plugin:<android-agent-version>' // Set to your Android Agent version.
    }
}
allprojects {
    repositories {
        jcenter()
    }
}Activate the Plugin
In your module-level build.gradle, add the adeum plugin immediately after the com.android.application plugin, so that it looks similar to the example below:
apply plugin: 'com.android.application'
apply plugin: 'adeum' // this line added for AppDynamicsApache Maven Project
If your application is a Maven Project:
Add the following code to the
<dependencies>section:<dependency> <groupId>com.appdynamics</groupId> <artifactId>appdynamics-runtime</artifactId> <version>1.0</version> </dependency>TEXTAdd the following code to the
<plugins>section:<plugin> <groupId>com.appdynamics</groupId> <artifactId>appdynamics-maven-plugin</artifactId> <version>1.0</version> <executions> <execution> <phase>compile</phase> <goals> <goal>adinject</goal> </goals> </execution> </executions> </plugin>TEXT
Ant/Eclipse
See the Knowledge Base article Use Ant to Build Android Apps with the AppDynamics Android SDK for instructions.
Instrument the Android Application
After you have completed building your application, follow the steps below:
- Add the Required Permissions
- Get the Application Key
- Modify the Source
- Run the Build
- Verify Instrumentation
Add the Required Permissions
Open your application's AndroidManifest.xml file and verify that it has these permissions:
<uses-permission android:name="android.permission.INTERNET"></uses-permission>
<uses-permission android:name="android.permission.ACCESS_NETWORK_STATE"></uses-permission>If both of these permissions are not present, add them.
Get Your EUM App Key
To get your EUM App Key in the Controller UI:
- From the top navigation bar of your Controller UI, go to User Experience > Mobile Apps.

Click Add App > Android to open the Getting Started Wizard - Android page.

Click Manual.

Due to AppDynamics no longer supporting Android Studio >= 4.0, we do not recommend using the Android Studio Plugin installation method as of May 2020 (when Android Studio 4.0 released). Instead, please follow the manual installation method in the steps below.
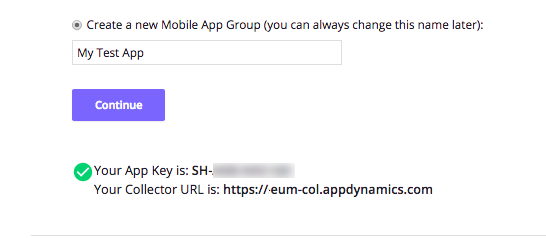
- Select Create a new Mobile App Group, enter an application name, and click Continue.
- Copy the displayed App Key and the Collector URL.
Modify the Source
In the source file that defines your application's primary Activity, add the following import:
import com.appdynamics.eumagent.runtime.Instrumentation;JAVAIn your primary Activity's
onCreate()method, add the following lines, passing in the EUM App Key from Step 2 above:Instrumentation.start(<EUM_APP_KEY>, getApplicationContext());JAVASave the file. Your code should look something like this:
import com.appdynamics.eumagent.runtime.Instrumentation; ... @Override public void onCreate(Bundle savedInstanceState) { Instrumentation.start(<EUM_APP_KEY>, getApplicationContext()); ... }JAVAConfigure the Android Agent to report metrics and screenshots to the SaaS EUM Server and Screenshot Service in your region when initializing the agent with the methods
withCollectorURLandwithScreenshotURL. (If you are using an on-premises EUM Server, see Customize the Agent Configuration for implementation details.)import com.appdynamics.eumagent.runtime.Instrumentation; ... @Override public void onCreate(Bundle savedInstanceState) { Instrumentation.start(AgentConfiguration.builder() .withAppKey("<EUM_APP_KEY>") .withContext(getApplicationContext()) // The default SaaS EUM Server and Screenshot Service are in the Americas, // so you can omit the following settings if you are in the Americas. .withCollectorURL("https://<your_region>.eum-appdynamics.com") .withScreenshotURL("https://<your_region>-image.eum-appdynamics.com/") .build()); ... }JAVAIn your module-level
build.gradlefile, add your AppDynamics account information as configurations in theadeumsnippet. If you complete this step in the Getting Started Wizard, the configurations will populate in the UI code snippet. If you cannot get the EUM App Key from the Getting Started Wizard, see Access Browser Monitoring Configuration.dependencies { compile 'com.appdynamics:appdynamics-runtime:<latest version>' // This line is added for AppDynamics. } adeum { // This section is added for AppDynamics. account { name '<account name>' licenseKey '<key>' }JAVAIf you are using Android Studio, you need to add a build script block to the top of your project's
build.gradlefile and define the gradle plugin dependency:// project build.gradle buildscript { dependencies { classpath("com.appdynamics:appdynamics-gradle-plugin:<latest-version>") } } plugins { id 'com.android.application' version '7.2.1' apply false id 'org.jetbrains.kotlin.android' version '1.7.0' apply false id 'org.jetbrains.kotlin.plugin.serialization' version '1.7.0' }JAVAIf the option above is unavailable, you can also add a dependency resolution strategy block to the plugin management block of your
settings.gradlefile:// project settings.gradle pluginManagement { repositories { gradlePluginPortal() google() mavenCentral() } resolutionStrategy { eachPlugin { plugin -> if (plugin.requested.id.id == "com.appdynamics.appdynamics-gradle-plugin") { useModule("com.appdynamics:appdynamics-gradle-plugin:<latest-version>") } } } }JAVA
Run the Build
Build your Android app following the instructions for your build system:
Here is an example of something you would see in your console:
 [injector] 				/=========================================\
 [injector] 				| AppDynamics BCI Instrumentation summary  |
 [injector] 				\=========================================/
 [injector]
 [injector]
 [injector] 		 - Total number of classes visited (#720 classes)
 [injector] 		 - Total number of classes instrumented (#1 classes)
 [injector] 		 - Total number of classes failed to instrument (#2 classes)
 [injector] 		 - Total number of features discovered (#3)
 [injector]
Verify the Instrumentation
Based on the build system you used, verify that the instrumentation was successful:
Gradle/Android Agent Installer Plugin
If you didn't use the -i flag, check to make sure there is a line in your console output that contains "inject". If you don't see this information printed in your console, either your project is incorrectly configured or the injector failed to run completely. There is a very detailed log of this process either at <project>/target/appdynamics_eum_android_bci.log or <module>/target/appdynamics_eum_android_bci.log.
Maven
If you don't see this information printed in your console, either your project is incorrectly configured or the injector failed to run completely. There is a very detailed log of this process either at <project>/target/appdynamics_eum_android_bci.log or <module>/target/appdynamics_eum_android_bci.log.
Ant
If you don't see this information printed in your console, either your project is incorrectly configured or the injector failed to run completely. There is a very detailed log of this process either at <project>/target/appdynamics_eum_android_bci.log or <module>/target/appdynamics_eum_android_bci.log.