Download PDF
Download page Configure Cisco AppDynamics for Splunk Log Observer Connect.
Configure Cisco AppDynamics for Splunk Log Observer Connect
This page describes the steps required to configure Splunk AppDynamics SaaS to view the logs on either Splunk Cloud Platform or Splunk Enterprise.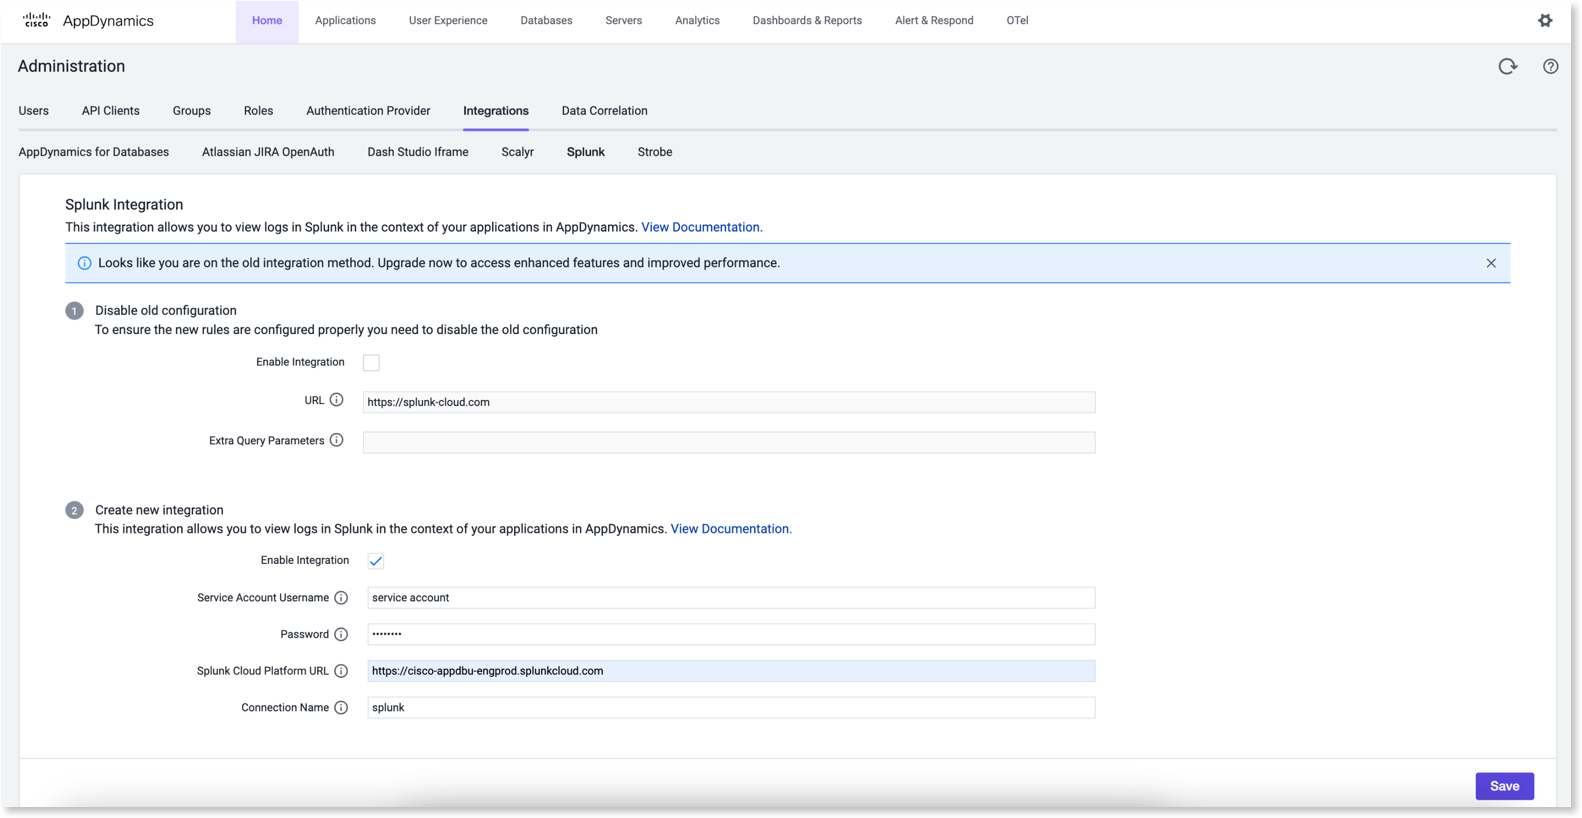
Prerequisites
Ensure that:
- you use the Controller version 24.10.0 or later.
- your administrator has set the
splunk.log.connect.enabledflag totruein the controllerglobal_configuration_clustertable. If the integration is still not available, contact Splunk AppDynamics Support to add thesplunk.log.connect.enabledproperty with valuetrueat the account level.
Before your Begin
Before performing the integration, ensure that you have:
- configured Splunk Cloud service account user.
- configured the universal forwarder in your Splunk environment.
- upgraded the AppDynamics Java, .NET, and Node JS agents and configured them.
Configure the Splunk Platform Integration
You can configure Cisco AppDynamics SaaS to send logs to either Splunk Cloud or Splunk Enterprise.
Configure Splunk Cloud Integration
- Log in to the Controller UI as an administrator.
- Select Settings > Administration.
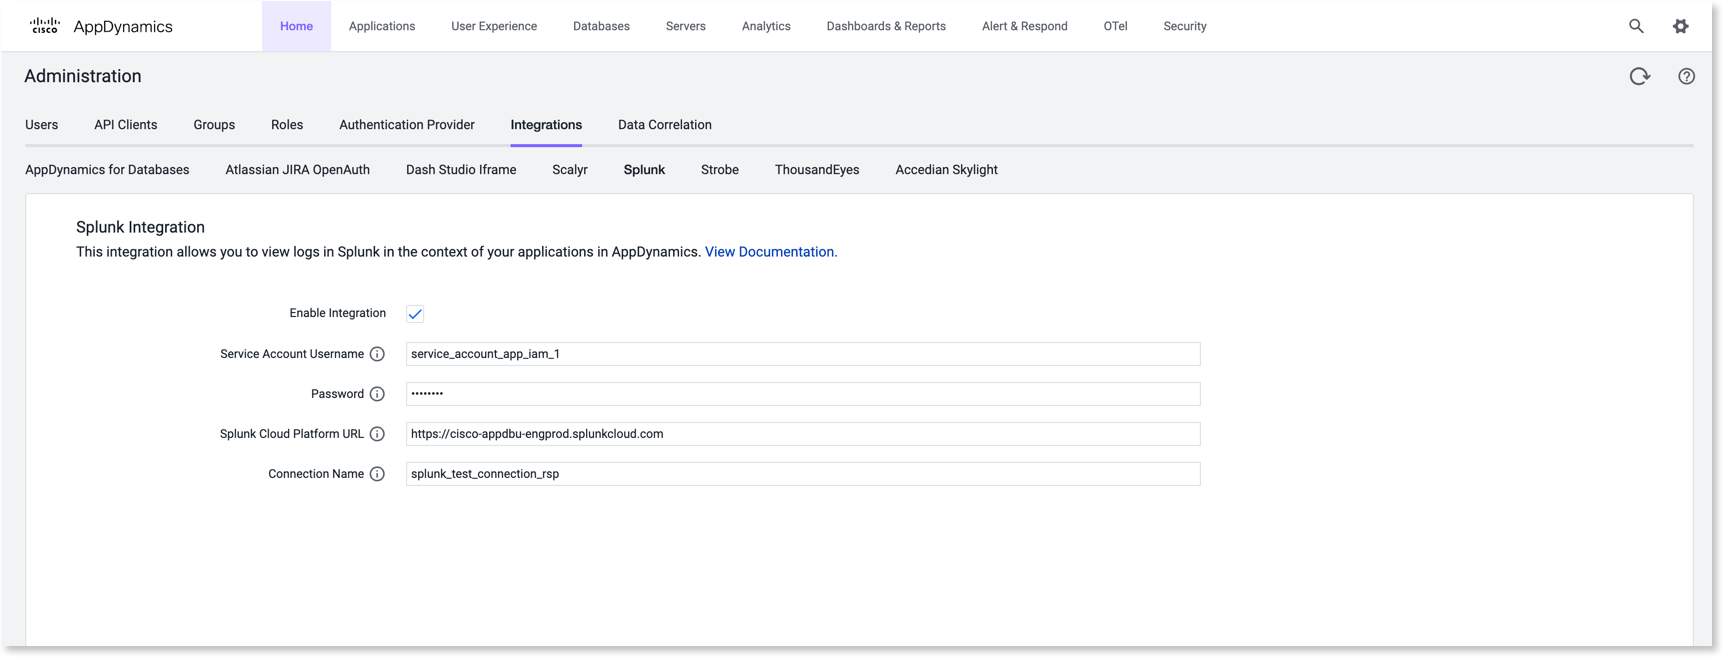
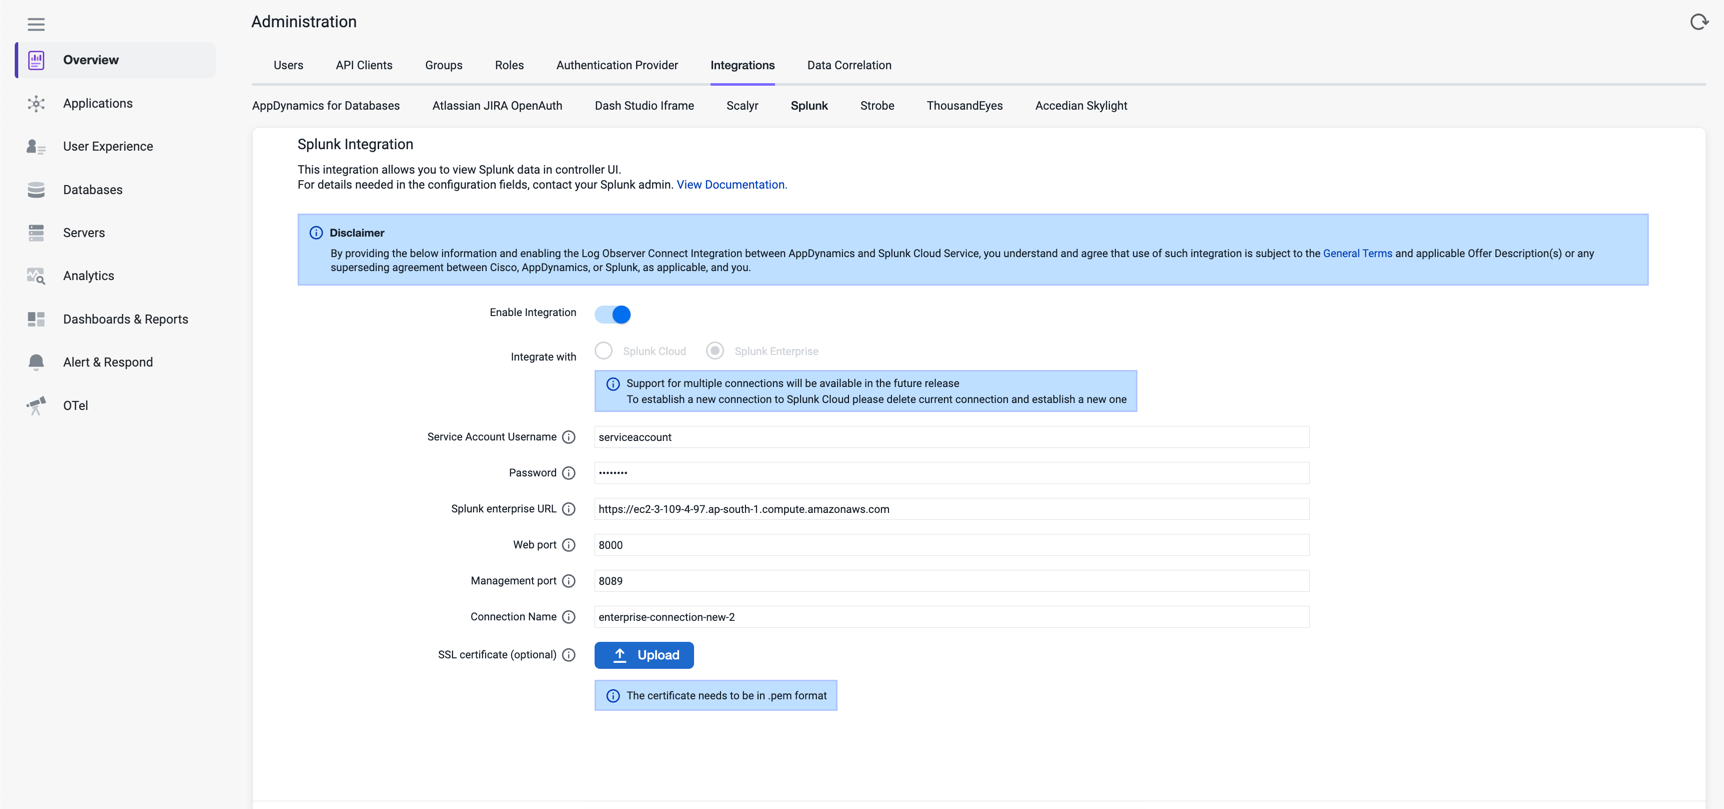
Select Integrations > Splunk.
Select the Enable Integration checkbox.
- In the Integration with option, select Splunk Cloud.
- In the Service Account Username field, enter the name of the user that you have provided during the Splunk Cloud service account user configuration. You can find the name in Splunk Cloud Platform. See Splunk Documentation.
- In the Password field, enter the password for the Splunk Cloud service account user. You can obtain the password from the Splunk administrator who created the Splunk Cloud service account user.

When you make any changes in this integration form, you must re-enter the password.
- In the Splunk Cloud Platform URL field, enter the URL of the Splunk Cloud Platform that you want to integrate with.
- In the Connection Name field, enter a name of your choice for this integration. This connection name helps you to identify your integration and the related data.
- Click Save.
After you save the integration, wait for a few seconds on this page until the integration is saved successfully.
Configure Splunk Enterprise Integration
To configure Cisco AppDynamics SaaSto send logs to Splunk Enterprise:
- Log in to the Controller UI as an administrator.
- Select Settings > Administration.
Select Integrations > Splunk.
Select the Enable Integration checkbox.
- In the Integration with option, select Splunk Enterprise.
- In the Service Account Username field, enter the name of the user that you have provided during the Splunk Enterprise service account user configuration. You can find the name in Splunk Enterprise. See Splunk Documentation.
- In the Password field, enter the password for the Splunk Enterprise service account user. You can obtain the password from the Splunk administrator who created the Splunk Enterprise service account user.
When you make any changes in this integration form, you must re-enter the password.
- In the Splunk enterprise URL field, enter the URL of the Splunk Enterprise that you want to integrate with.
- In the Web port field, enter the port number of the Splunk Enterprise web interface. The default HTTP/ HTTPS port for Splunk web is 8000.
- In the Management port field, enter the management port number that is used for internal communication in your Splunk deployment. The default management port is 8089.
- In the Connection Name field, enter a name of your choice for this integration. This connection name helps you to identify your integration and the related data.
- In the SSL certificate (optional) field, upload the self-signed SSL certificate if you are using to secure the connection between Cisco AppDynamics SaaS and Splunk Enterprise.
- Click Save.
After you save the integration, wait for a few seconds on the integration page until the integration is saved successfully.
Delete Integration
If you want to configure a new integration with Splunk Cloud Platform or Splunk Enterprise, you must delete the existing integration. Click Delete connection to remove the existing integration.