Download PDF
Download page Install the Network Agent on Windows.
Install the Network Agent on Windows
The Network Visibility on Windows requires a supported version of the Network Agent to be installed on the server.
To monitor Java applications in your Controller, install the AppDynamics Java Agent on each server that hosts applications that you want to monitor.
You need a Network Visibility license to enable the Network Agent and its features.
No additional configuration is required on your AppDynamics Controller; Network Visibility is enabled by default.
Agent Install Directory
Network Agent is packaged as a zip bundle. The Network Agent install directory <network_agent_home> is the directory where you install the Agent. You can unzip the bundle at any location which is your <network_agent_home> directory.
It contains these administrative files:
install.batto install and start the Network Visibility Agentstart.batto start the Network Visibility Agentstatus.batto check the status of the Network Visibility Agentstop.batto stop the Network Visibility Agentuninstall.batto uninstall the Network Visibility Agent
As part of the installation, install.bat installs the required VC redistributable on the system along with NPcap (if it does not already exist). If Npcap does exist on the system, then the installation of NPcap is skipped. To listen to the traffic on localhost, NPcap should be running in LoopBack mode. If NPcap is already installed on the system and not running in loopback mode, you must re-install it using loopback mode.
Network Agent and Java Agent Installation Instructions
Depending on the Network Agent version and Java Agent version, you can install the Network Agent in a multi-tenant or single-tenant setup:
| If you are using | Multi-tenant Setup | Single-tenant Setup |
|---|---|---|
| Network Agent >= 4.5.7, and Java Agent >= 4.5.11 | Install | Install |
| Network Agent >= 4.5.7, and Java Agent <= 4.5.10 | Not supported | Install |
Install Network Agent on Windows using the ZIP Installer
These steps describe how to install and run the Network Agent for Windows using the ZIP installer.
- Review the Network Visibility Requirements and Supported Environments.
- Download the Network Agent Windows ZIP package from the AppDynamics Downloads Portal and unzip the package.
- Verify your
administratorpermissions on the host where you want to install the Network Agent. - Extract the contents to the Agent installation directory
<network_agent_home>.
- Verify your
Double-click the
install.batfile to install the Network Agent and start the AppDynamics Network Visibility Service.If you run the
install.batscript withoutadministratorprivileges, a dialog displays this message: "Do you want to allow this app to make changes to your device?"Click Yes to continue with the installation.
- To verify if the Network Agent is running, navigate to the folder that contains the
status.batfile.- Double-click the
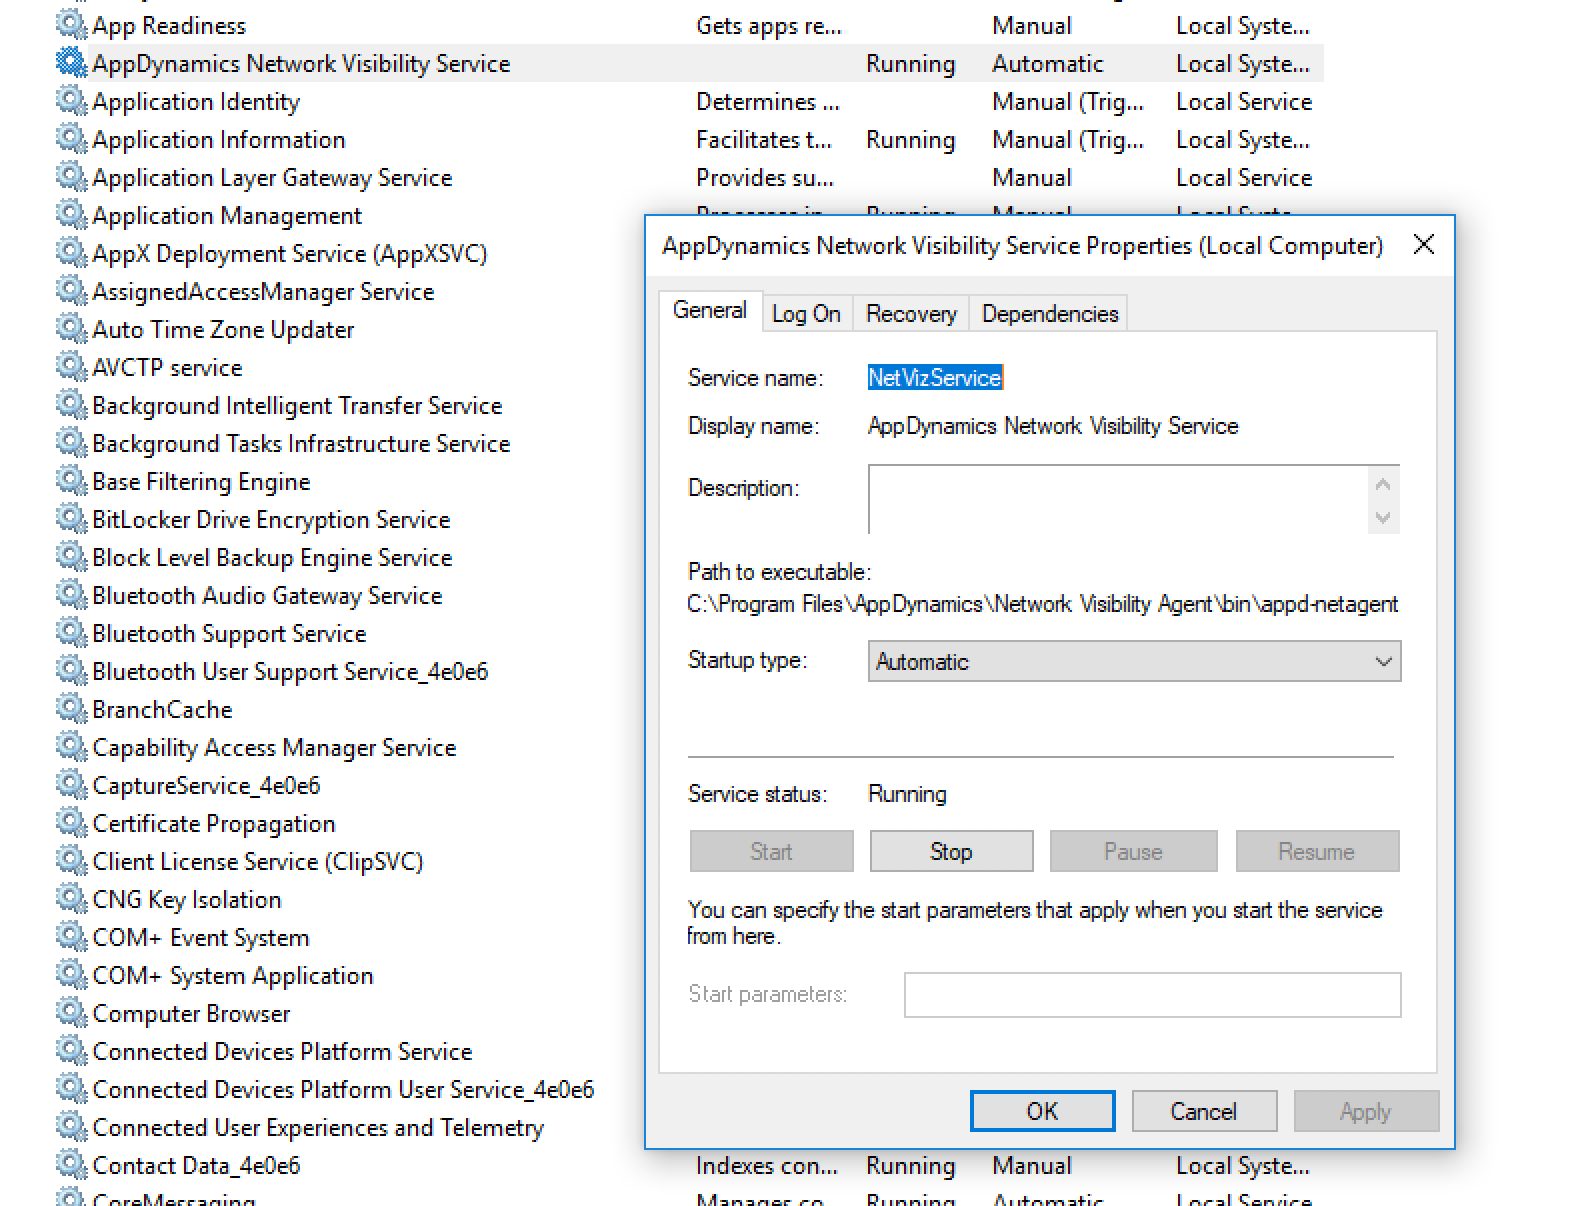
status.batfile. - Locate the AppDynamics Network Visibility Service and verify its status in the Status column.
Alternately, check if AppDynamics NetViz Service is listed in services.msc.
- Double-click the
Uninstall Network Agent Using the ZIP
To uninstall the Network Agent:
- Open a Windows command prompt and
cdto the<network-agent-home>directory. - Uninstall the Network Agent by entering:
\<network-agent-home>\uninstall.bat.
Install Network Agent on Windows using the MSI Package
To install the Network Agent using the MSI package:
- Review the Network Visibility Requirements and Supported Environments.
- Download the MSI installer package from the AppDynamics Download Center.
- Run the MSI installer package.
- Read the End User License Agreement and accept the terms. Click Next.
If required, change the Network Agent installation directory on the Destination Folder panel.
You can also change the destination of the logs directory later using the AppDynamics Agent Configuration utility.
Click Next. The Ready to install page displays.
Click Install. The User Account Control panel displays and prompts you for permission to install.
From the User Account Control panel, click Yes to allow the installer to make changes to the device. Wait for the installation to complete.
If you do not have administrator privileges, the installer prompts you to provide the password for an administrator account.
- Click Finish.
- Verify the installation by reviewing the Control Panel for AppDynamics NetViz Agent and
service.mscfor NetVizService.

Uninstall Network Agent Using the MSI Package
To uninstall the Network Agent:
- Open the Windows Control Panel and select AppDynamics NetViz Agent.
- Click Uninstall.
- From the User Account Control panel, click Yes to uninstall the Network Agent.