Download PDF
Download page Configure Policies.
Configure Policies
This page provides instructions on configuring policies in AppDynamics. You can configure policies using these two methods:
- Use the Policy Setup Wizard for simple policies that send an email notification when a health rule is violated.
- Configure the policy manually for anything more complicated.
To configure policies, you need the Configure Policies permission.
Policy Setup Wizard
For simple policies in the Controller, select Alert & Respond > Policies > Policy Setup Wizard.
To create a notification policy, you must set up an SMTP server and supply an email address. The policy is then created.
To modify the policy later, select the policy and click Edit.
Create Policy Manually
To create a policy manually in the Controller, select Alert & Respond > Policies > Create Policy Manually.
The Create Policy page contains the following panels:
- Trigger: Sets the events that trigger the policy, entities that are affected by the policy.
- Health Rule Scope: Defines the Health Rules that trigger the policy.
- Object Scope: Defines the objects that trigger the policy for application and user experience contexts.
- Actions: Set the actions to take when the policy is triggered.
In either panel, you can configure the policy name, enabled status, and whether to batch the actions executed by the policy.
Create Policies
- Click Alert & Respond.
- Click Policies either in the right panel or the left navigation pane.
- Select the context for the policy (specific Application, User Experience, Databases, Servers, or Analytics) from the dropdown.
- To create a new policy, click Create Policy (+).
You can edit, copy, enable or disable, and delete a policy by clicking the appropriate button.
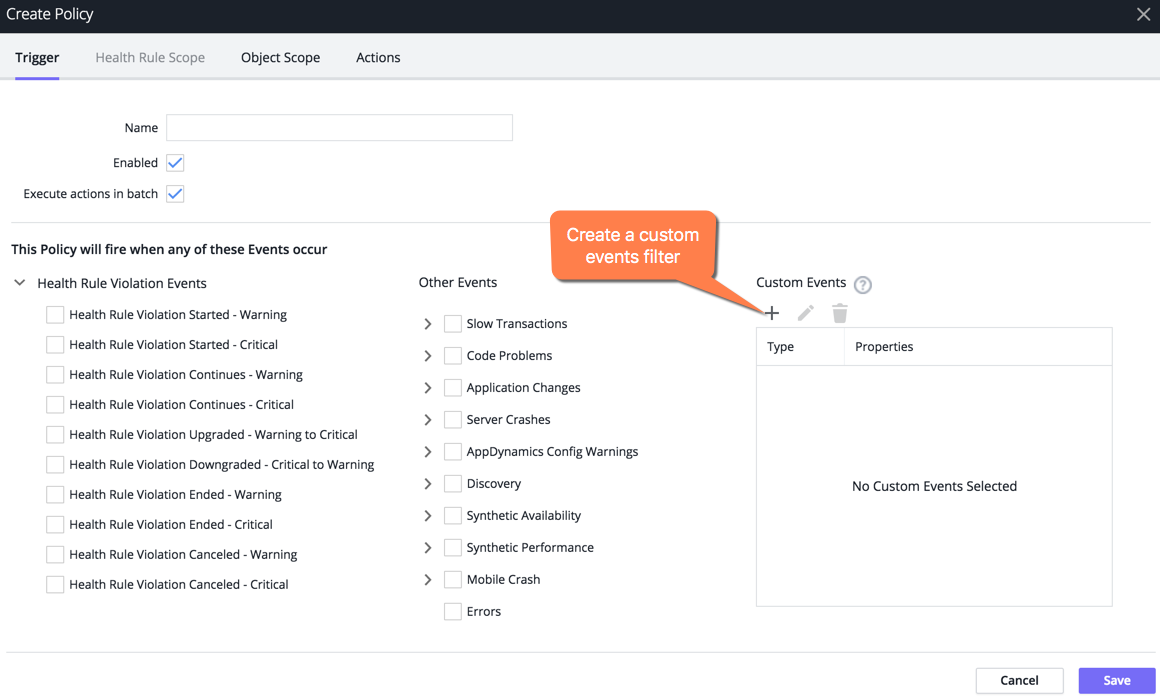
Configure Policy Triggers
The policy trigger panel defines the events and objects that cause the policy to run and invoke its actions.
For policy triggers that depend on health violation events, you must create the health rules before you can create a policy that uses them. See Health Rules and Troubleshoot Health Rule Violations.
- Click Create Policy (+) or select a policy and click Edit (pencil button).
- Enter a name for the policy in the Name field.
- To enable the policy, select the Enabled checkbox. To disable the policy, clear the Enabled checkbox.
You can also enable or disable a policy by selecting it from the policy list and clicking Enable or Disable. - If you clear the Execute actions in batch checkbox, the policy starts its actions immediately for every triggering event. If you check this checkbox, the policy starts its actions once for all the triggering events that occurred in the last minute. See 'Policy Actions in Batch' in Policies.
- Select the Trigger panel if it is not already selected.
- Check one or more types of events that should trigger the policy. You may need to click the arrow to display specific events within an event category.
If you check at least one health rule violation event, you can choose whether any or all health rule violations, or only specific health rule violations will trigger the policy.
If your AppDynamics environment includes browser synthetic monitoring, other additional events display for Synthetic Availability and Synthetic Performance. See 'Alerting and Synthetics' in Browser Synthetic Monitoring.
You can optionally designate specific custom events to trigger the policy, using the Custom Events panel in the lower right corner. Click +.
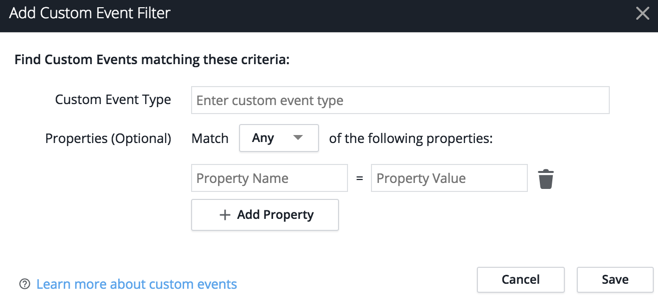
Specify the custom event type. Optionally, add particular properties on that event as key/value pairs.
- For Any, at least one property must exist and match.
- For All, all properties must exist and match.
Configure Health Rule Violation Triggers
The Health Rule Scope panel determines the scope of the health rule violations that trigger the policy. If you have not created a health rule, you can create one by selecting Create Health Rule in this panel.
- If you have not already done so, edit the policy to which you want to add Health Rule triggers.
- Select the Health Rule Scope panel, then select Any Health Rules if you want the policy triggered by a violation of any health rule.
- To designate specific health rule violations to trigger the policy, click +, and then select the health rules from the embedded health rule browser. Click Create Health Rule to create a new health rule as the trigger for this policy.

Configure Object Scope
The Object Scope panel defines the objects the policy is triggered on. The object scope applies only to business transaction performance type health rules and node health type health rules which comprise tiers and nodes.
- When you have finished selecting the health rule violations that trigger the policy, click the Object Scope panel to select objects to be monitored in case of an event. If you select Any Object, the policy will be triggered by the configured events when they occur on any object in your application.
- To restrict the policy to specific objects, select These Specified Objects and then choose the objects.
For example, the following policy starts when selected events occur on the ECommerce Server tier. You can similarly restrict the objects to specific nodes, business transactions, Ajax Requests, and so forth.
You can restrict the affected nodes on the node name, on the type of node (such as Java and .NET) on nodes in certain tiers, or on criteria such as meta-info, environment variables, and JVM system environment properties. Meta-info includes key-value pairs for:- key:
supportsDevMode - key:
ProcessID - key: appdynamics
.ip.addresses - any key passed to the agent in the
appdynamics.agent.node.metainfosystem property
- key:
- Click Save.
Configure Policy Actions
The policy actions panel binds an action to the trigger. It defines which actions the policy automatically initiates when the trigger causes the policy to start.
The actions must be created before you can create a policy that starts them. See Actions and the documentation for individual types of actions (for example, notification actions, remediation actions) for information on creating an action.
- If you have not already done so, edit the policy to which you want to add actions. See To Access the Policy Wizard.
- Select the Actions panel.
- Click +. The list of existing actions displays. The available actions vary depending on the product area selected for the policy, such as Applications, Servers, Databases and so on.
You can filter the list by selecting the checkboxes for the types of actions you want to see. In the list of actions, select the action that you want this policy to execute and click Select.
If you do not see an appropriate action for your needs, click Create. For information on creating actions, see Actions. After you have created the action, select it here to assign it to the policy that you are configuring.Click Save.
You can optionally test whether your action will be fired using the Test Action Execution. Ensure that the policy you are testing is enabled.