Download PDF
Download page Correlate Business Transactions for EUM.
Correlate Business Transactions for EUM
Related pages:
This page describes how to correlate business transactions for End User Monitoring (EUM). You can correlate the network request events of EUM applications with the business transactions of Business Applications. The EUM application can be a browser, mobile, or IoT application. The correlation is made between EUM application beacons containing network request event information and instances of business transactions (transaction snapshots).
For detailed information, including how and what is correlated for each type of EUM application, see these pages:
Benefits of Correlating Business Transactions
By correlating business transactions with network request snapshots, you can identify potential issues with the backend application that are causing bad user experiences. For example, you might find that a server error or a database query is causing a slow user experience.
Before You Begin
To correlate business transactions:
- Purchase licenses for Application Performance Monitoring (APM) and End User Monitoring (EUM).
- Instrument a business application with a supported app server agent.
- Instrument an EUM application (browser, mobile, or IoT application).
If automatic business transaction correlation is not supported for your app server agent, you can manually enable business transaction correlation in the Controller UI.
Business Transaction Correlation Support for App Server Agents
This table shows the app server agents that support business transaction correlation.
- Automatic correlation support means that business transactions are automatically correlated.
- For manual correlation, you must manually enable business transaction correlation.
App Server Agent | Type of Correlation Support | |
|---|---|---|
| Automatic (Java Agent >= 20.3.0, and Controller >= 20.4.0) | ||
| .NET Agent | .NET Framework: Automatic (.NET Agent >= 20.9.0, and Controller >= 20.10.0) | |
| .NET Core: Automatic (.NET Agent >= 21.1.0, and Controller >= 20.10.0), Windows only | ||
| Linux: Automatic (.NET Agent >= 21.5) | ||
| Manual | ||
| Manual | ||
| Python Agent | Manual | |
Access Business Transaction Correlation
To configure business transaction correlation:
- In the Application Dashboard, click Configuration > User Experience App Integration.
Under the Business Transaction Correlation tab, there are two options depending on the correlation support for your App Server Agents:
For agents with support for automatic correlation, see Automatic Correlation of Business Transactions.
For agents without support for automatic correlation, see Manually Enable Business Transaction Correlation.
Automatic Correlation of Business Transactions
By default, the correlation of business transactions of business applications instrumented with Java Agent >= 20.3.0 is enabled.
Under the Business Transaction Correlation tab, you can choose to opt out or filter requests with match or exclude rules.

Opt In to Automatic Correlation
To opt in to have business transactions automatically correlated, you must use Java Agent >= 20.3.0. If you are using an older version of the Java Agent, you must upgrade the agent.
For unsupported agents, you need to manually enable business transaction correlation.
Opt Out of Automatic Correlation
If business transaction correlation is enabled by default, you can opt out by:
- In the Application Dashboard, click Configuration > User Experience App Integration.
Under the Business Transaction Correlation > Opt Out of Correlation, click opt out of correlation.
- From the Opt Out of Correlation dialog, click Opt Out.

Manually Enable Business Transaction Correlation
For app agents that do not have automatic correlation support, you need to manually enable business transaction correlation.
To manually enable business transaction correlation:
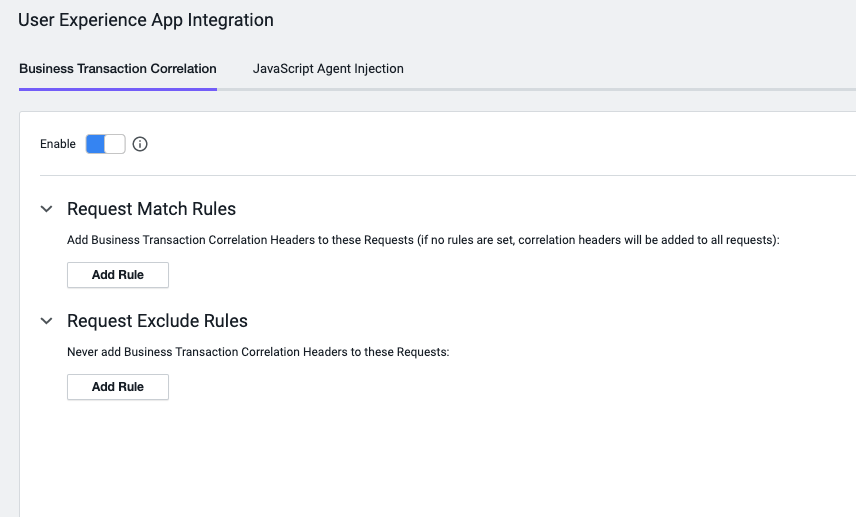
- In the Application Dashboard, click Configuration > User Experience App Integration.
Under the Business Transaction Correlation tab, check the Enable Business Transaction Correlation checkbox.
Disable Business Transaction Correlation
To disable business transaction correlation:
- In the Application Dashboard, click Configuration > User Experience App Integration.
Under the Business Transaction Correlation tab, toggle the Enable button.
Filter Business Transactions for Correlation
You can also specify which business transactions includes or excludes correlation headers. If you do not add request match rules or request exclude rules, all requests have correlation headers by default.
To add a request match or exclude rule:
- From Filtering Options, expand Request Match Rules or Request Exclude Rules.
- Click Add Rule.
- Check the Method to use the default
HTTPmethodGETor select a differentHTTPmethod. - Check the URI checkbox and select one of the matching methods from the dropdown:
- Starts With
- Ends With
- Contains
- Equals
- Matches RegEx
- Is in List
- (Optional) Click
 and check the NOT checkbox. This condition reverses the results by excluding the requests that match the specified parameters.
 - Click Add Rule.